Configure SSH on Windows 10
Windows 10 Fall Creators Update comes with a hidden gem - ssh client and a less important ssh server, both based on OpenSSH. This is big news as you can now access your favorite server right from the command line without the need for PuTTY or other ssh clients.
This new feature is not installed by default so you will have to go through a few steps to make it available. This is done by following these simple steps:
- Opening Settings
- Click on Apps
- Click on Manage optional features
- Click on Add a feature
- Scroll to OpenSSH Client (Beta) and click on it and then click the install button
- I also had to reboot the computer but that might not be necessary
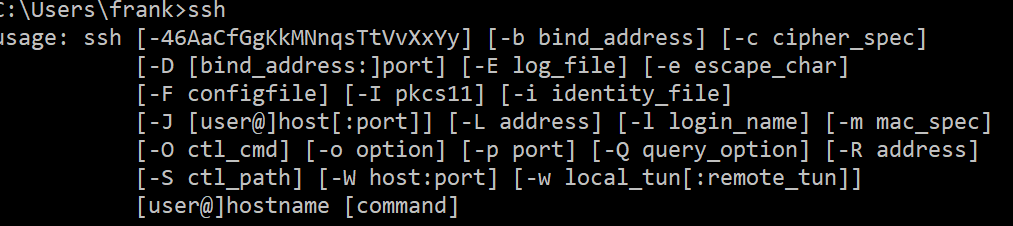
That's it not you have ssh available on the command line. Typing ssh on the command line looks like this:
If you connect to hosts using userid and password you should be ready to start using the feature. I would recommend using keys to connect, especially if you are in control over the host and can configure the ssh server to disallow PasswordAuthentication by setting "PasswordAuthentication no" in /etc/ssh/sshd_config and restarting the sshd server. Make sure you have tested that you can connect with key before you make this change.
In order to use ssh keys you will have to generate a private and a public key. If you have done this before you are most likely used to the following command:
ssh-keygen -t rsa -b 4096
That will generate a pair of RSA keys typically named id_rsa and id_rsa.pub.
The Windows 10 implementation does not look like it supports RSA keys as the above command returns the error "unknown key type rsa". Changing the command to
ssh-keygen -t ed25519 -b 4096
Does work and it does generate a pair of keys named id_ed25519 and id_ed25519.pub. These will be placed in a folder called .ssh in the users home directory. I have not tested if it works if the .ssh directory is missing. I had one already from my PuTTY installation.
The next step is to log into the ssh server where you want to use the keys for authentication. When you are logged on to the server you can edit the file ~/.ssh/authorized_keys and add a line where you past the content of id_ed25519.pub. Make sure it is the public file you are copying.
Logout from the server and type
ssh <user>@<hostname>
If the ssh server supports the ed25519 format you should be able to login without using a password. When I tried this on my CentOS 7 based hosts I received errors related to the servers lack of support for the format. It was an easy fix to change that. On CentOS 7 the ssh client and server configuration files are placed in /etc/ssh. In the file called sshd_config there are by default two lines used to define the HostKey values in use for the server. This looks like this:

The file ssh_host_key_ed25519_key is already installed in the folder. WHen you have edited the file you must restart the sshd server with the command:
systemctl restart sshd
That's it, you now have access to ssh on the command line and you can connect to the server without using PuTTY or other ssh clients.
Best of all the scp command is also available. You can copy files to and from the server with commands like this:
scp <local file> <user>@<hostnam>:
It is important to remember the trailing : and any directory and filename you would like for the file on the host.
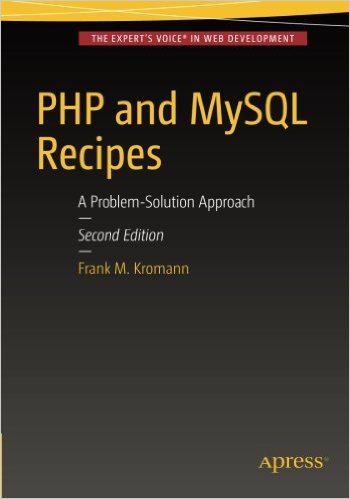
PHP and MySQL Recipes
In 2005 I wrote a few chapters in the book "PHP 5 Recipes". Since then PHP has evolved quite a bit with new features like Namespaces, type hinting and many more. In addition to features the core team has also been focused on performance and resource usage. That lead to the release of PHP 7 which claims to be twice as fast as PHP 5.6 and use only half the memory.
So it was time to upgrade the the book of recipes and when the three other authors from the first book declined to participate I decided to write all the chapters. The result is a book called "PHP and MySQL recipes", published by Apress in June 2016.
PHP Test
PHP Lorem Ipsum is simply dummy text of the printing and typesetting industry. Lorem Ipsum has been the industry's standard dummy text ever since the 1500s, when an unknown printer took a galley of type and scrambled it to make a type specimen book. It has survived not only five centuries, but also the leap into electronic typesetting, remaining essentially unchanged. It was popularised in the 1960s with the release of Letraset sheets containing Lorem Ipsum passages, and more recently with desktop publishing software like Aldus PageMaker including versions of Lorem Ipsum.
Lorem Ipsum is simply dummy text of the printing and typesetting industry. Lorem Ipsum has been the industry's standard dummy text ever since the 1500s, when an unknown printer took a galley of type and scrambled it to make a type specimen book. It has survived not only five centuries, but also the leap into electronic typesetting, remaining essentially unchanged. It was popularised in the 1960s with the release of Letraset sheets containing Lorem Ipsum passages, and more recently with desktop publishing software like Aldus PageMaker including versions of Lorem Ipsum.